
Having issues with leaking or broken water lines connected to your Whirlpool refrigerator? Replacing the water lines is a common repair that can restore full functionality and prevent further leaks. This comprehensive guide will walk you through everything you need to know about Whirlpool water line replacement.
What are Whirlpool Refrigerator Water Lines?
Whirlpool refrigerators that have water and ice dispensers use water lines to connect the fridge to the main water supply in your home. There are two main types of water lines:
Copper Water Lines
- Made of copper tubing with compression fittings on the ends
- Prone to pinhole leaks and cracking over time
- Difficult for DIY repairs due to tubing bending
Plastic Water Lines
- Typically 1/4″ polyethylene tubing with quick connect/disconnect fittings
- More flexible and easier to install than copper
- Can still develop cracks and leak over time
The plastic water lines are the most common type in modern Whirlpool fridges and tend to be simpler to replace than copper lines.
When to Replace Whirlpool Water Lines
There are a few signs that indicate it’s time to replace the water lines for your Whirlpool refrigerator:
- Visible leaks or water puddles under or around the fridge
- Reduced water flow from the dispenser
- Dispenser makes odd noises or doesn’t work properly
- Mineral deposits or “dirty water” from old plastic tubing
Water lines can degrade and develop leaks over time. Replacing them at the first signs of issues can prevent major leaks and water damage.
Gather Necessary Replacement Parts
Before starting, make sure you have all the required parts and tools:
- New water line kit (preferably OEM Whirlpool)
- Adjustable wrenches
- Phillips and flathead screwdrivers
- Needle-nose pliers (optional)
- Bucket to catch water when disconnecting lines
- Terrycloth rags or towels
Purchase a replacement kit made specifically for Whirlpool refrigerators. The kit will include two new water lines and may include shutoff valves, ferrules, fittings, and instructions.
Shut Off Water Supply and Power to Fridge
Before disconnecting anything, make sure to:
- Locate water supply shutoff valve (typically under sink) and turn off the water
- Disconnect fridge power cord from outlet
Shutting off the water ensures no leaks or spraying water when removing old lines. Unplugging the fridge prevents electrical shock risks while working.
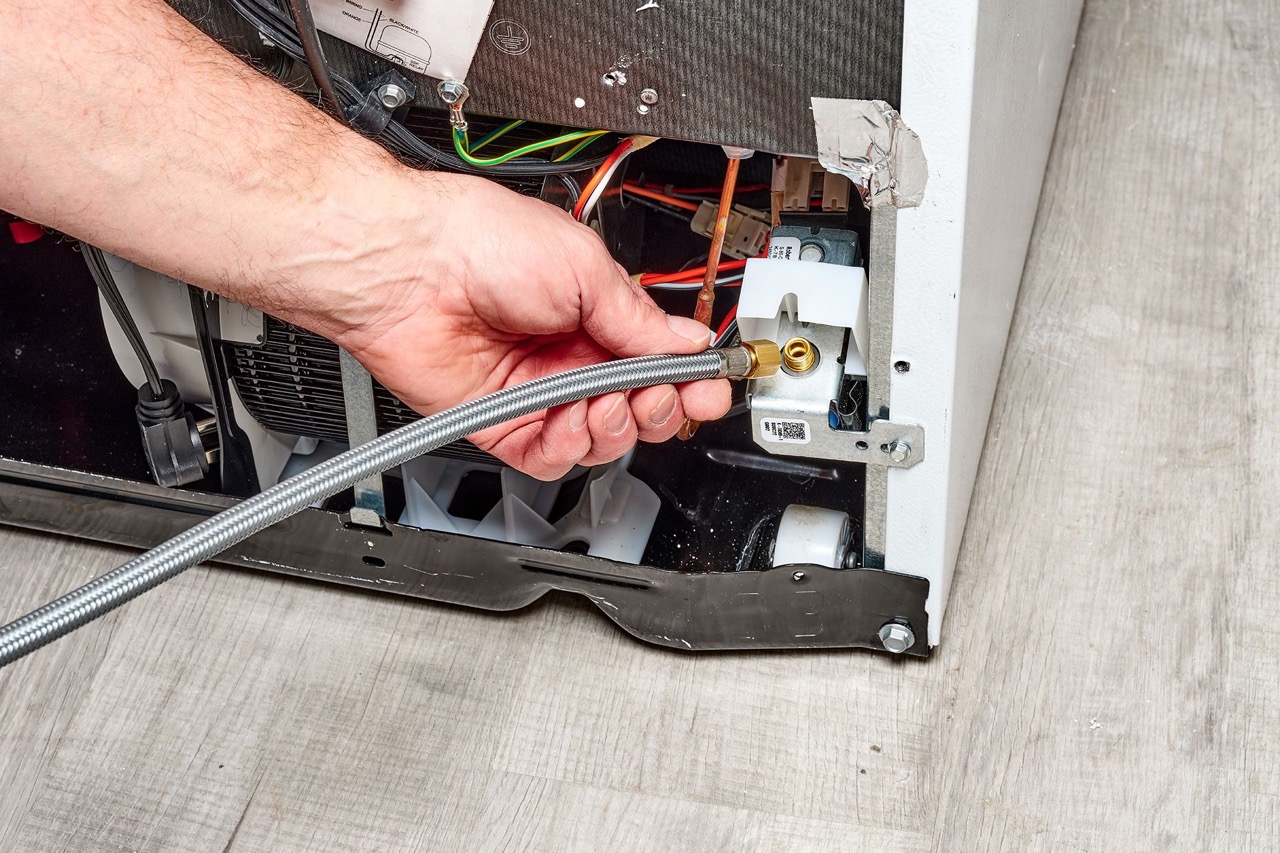
Disconnect Old Water Lines
With the water supply off and power disconnected:
- Pull fridge away from wall to access water lines
- Locate where lines connect to fridge and main supply
- Place bucket under connections to catch water
- Disconnect old lines at both ends using pliers or wrenches
- Inspect fittings at supply valve and fridge for corrosion
- Clean valve and fittings if needed to allow secure connections
Take notes on how the old lines are positioned to help when connecting new ones. Thoroughly drain all water from old lines over the bucket before removing completely.
Install New Whirlpool Water Lines
Follow these steps to safely install new OEM Whirlpool water lines:
- Connect new water line to supply valve (typically uses quick connect fitting)
- Connect other end of water line to inlet on fridge
- Repeat process for second water line
- Ensure lines do not kink, pinch, or rub against other components
- Turn on water supply and check for leaks
- Reconnect power when no leaks present
Refer to the instructions in your replacement kit for proper installation. Make sure all connections are completely secure.
Bleed Air and Check for Leaks
With lines connected and water supply back on:
- Open fridge doors and dispense water for 1-2 minutes to bleed air from lines
- Check all connections again for leaks
- Tighten fittings if necessary
- Verify dispenser functions properly
- Allow ice maker to fully cycle to ensure water flow
Bleeding the lines removes trapped air so the dispenser functions normally. Periodically inspect connections for several hours after install to confirm no leaks exist.
FAQs about Whirlpool Water Line Replacement
How long does it take to replace Whirlpool water lines?
Replacing both fridge water lines can typically be completed in 30-60 minutes by an experienced DIYer. Allow for extra time if modifications to supply valves or plumbing are needed.
Where can I find replacement water lines?
Genuine OEM Whirlpool water line kits can be purchased through appliance repair stores, authorized dealers, and reputable online retailers. Look for the correct part number for your specific Whirlpool model.
What are the costs for new Whirlpool water lines?
The parts alone usually range from $30-$60 for good quality OEM line sets. Extra costs may apply for tools, valves, fittings and professional installation if needed.
Can I replace just one water line?
It’s strongly recommended to replace both inlet lines at the same time to keep the system balanced and prevent premature failure of old tubing. Single line replacements may lead to other issues.
How do I clean mineral buildup in old lines?
For heavy limescale or sediment in lines, mix equal parts white vinegar and water. Dispense this solution through the lines into a container for 15 minutes before flushing with regular water.
Do I need to reset or program the fridge after line replacement?
Most Whirlpool models will automatically reset and resume normal ice maker operation after new lines are bled of air and water flow is restored.
What if the new lines still leak?
Ensure connections are completely tight and fittings are properly aligned. Uneven tubing cuts can cause leaks at connections. Use torque limiting pliers if needed to tighten lines.
Conclusion
While replacing water lines for your Whirlpool refrigerator isn’t the most complex job, having the right parts, following safe procedures, and properly bleeding the lines is key. Investing in a new OEM water line kit and completing this repair yourself can quickly solve leaks and restore full functionality to the ice and water dispenser. Just take your time and use appropriate caution when working with water supply connections. If the replacement task seems too daunting, hiring a professional may be worth the cost for peace of mind. With a quality Parts and proper installation, new Whirlpool water lines can provide years of reliable service.